Converting from Commercial to Recreational Use
Once you aquire a semi-truck that has been in commercial service you have to convert it to properly function in the recreational environment. On new trucks, we order them to our recreational specifications to minimize any changes required. On used trucks there are a number of things required to be done, and other things that are optional.
This section discusses the minimal things that we commonly do, but you can do more during a conversion project. The components specified are our recommendations, but other equivalent components are available in most cases. We specify these because we feel they are “best in class”, and are what we use personally.
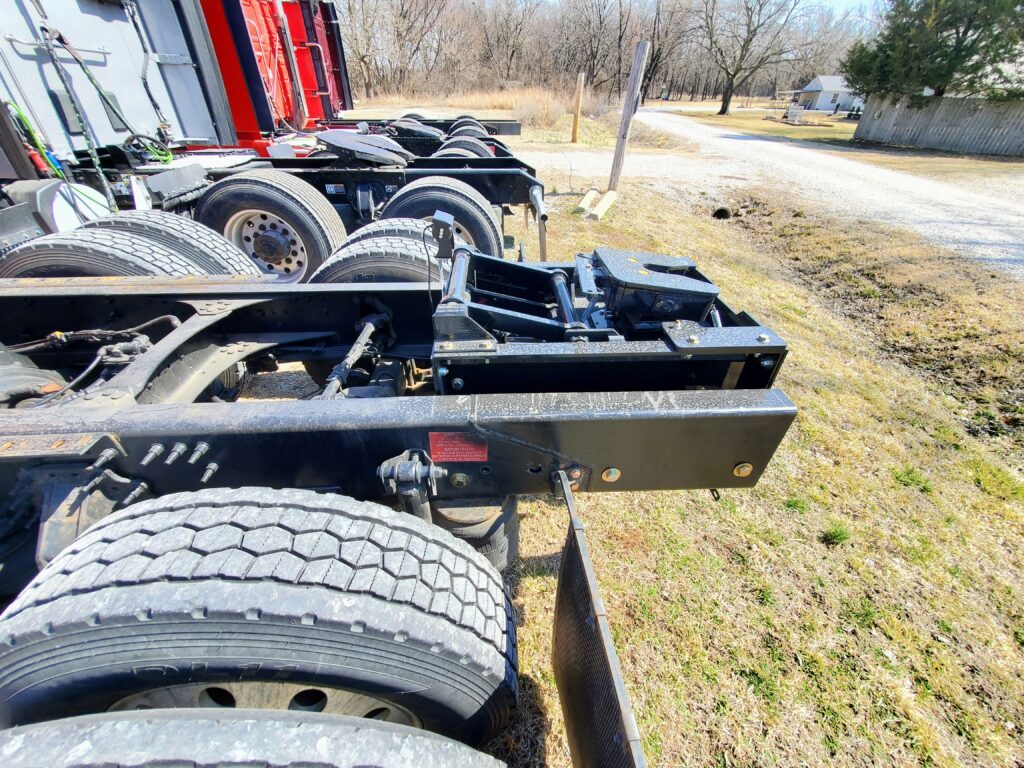
While you “can” hook up an RV to a commercial truck, the lighting will not work, there will be no brakes, and the commercial hitch will beat the RV up pretty well, in most cases. Some people do run commercial hitches with RVs but we recommend removing the commercial hitch if it is not required for your mission profile – and replacing it with an RV suspension hitch behind the axles.
Typical Minimal Conversion Changes
We are sometimes asked to just do a minimal conversion on a truck. This is done mainly to save money and/or time. Typically we would later build a body for the truck and do any other items desired for a more complete conversion. We can do a minimum conversion for you and we have a package price for that. The truck stays tandem, which saves the cost of singling, and the time of singling. We generally can turn out minimal conversion trucks fairly quickly, and then schedule you for a complete conversion later. The minimal conversion typically includes the items discussed here except for the singling.
The items discussed here are well suited to a DIY build and should provide you some guidance to what to expect to get a useful recreational hauler.
To be clear – if you want us to do the conversion then the packaged conversion is the minimum work we will do, and that is a tandem truck. As a company, we do not advertise – our work is our advertisement – and bare frame “conversions” do not represent our work well.
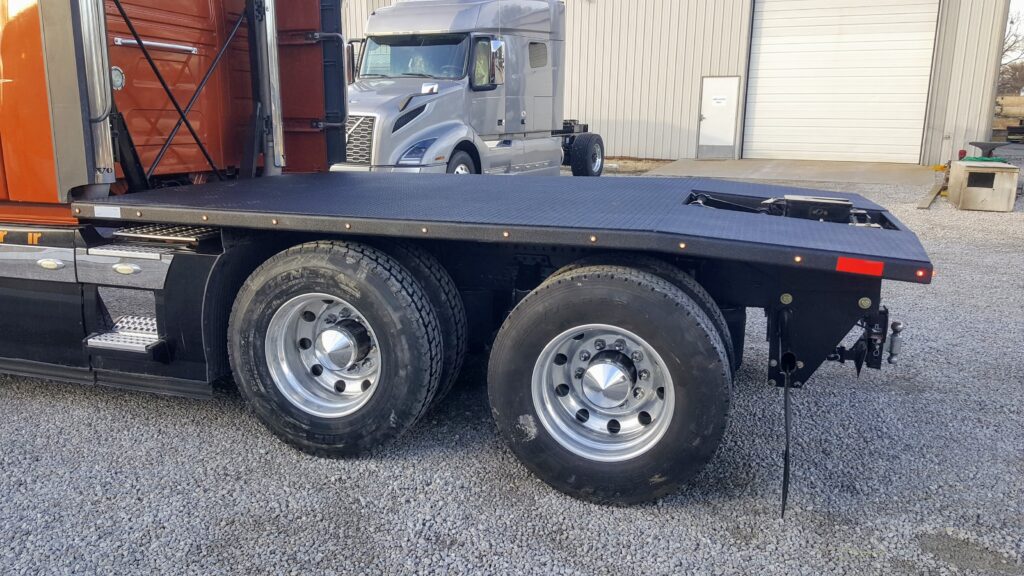
The truck below is one example of what a DIYer could do to keep your costs lower, and to have a useful tow vehicle. It is one way it could be done. When we do the minimal conversions we leave the truck tandem and there is not box at the rear.
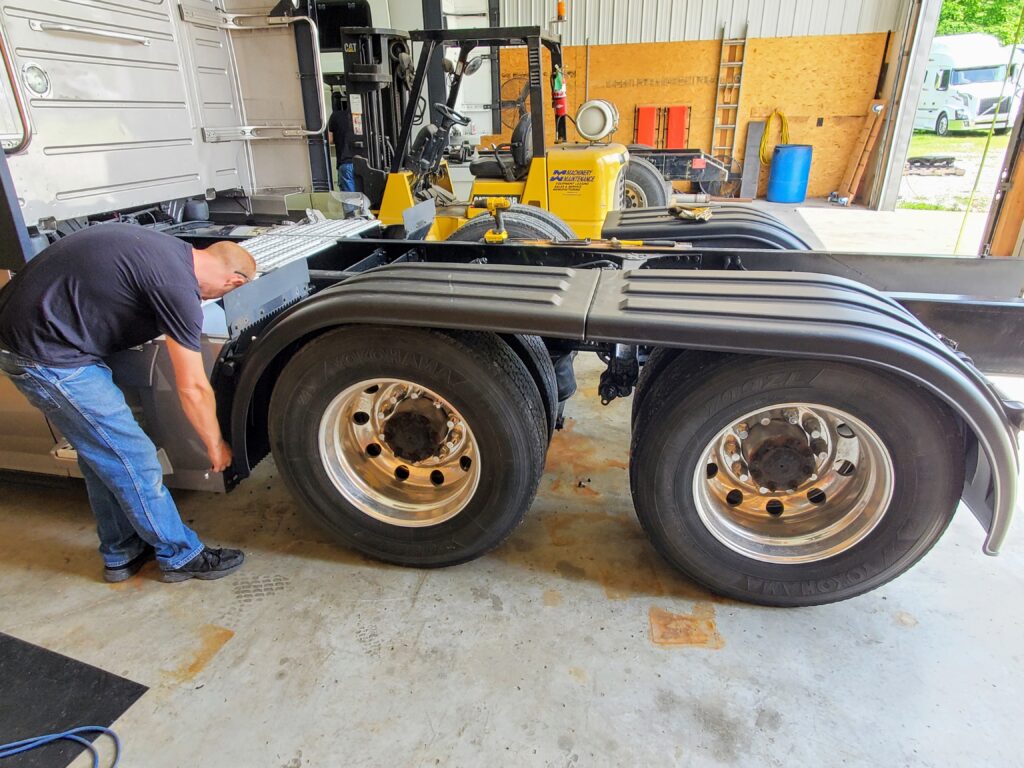
You will want to add fenders to the wheels to protect the front of the RV, and the rear of the truck. Note this is not necessary if putting on a body. If leaving the truck tandem, as is typical in a minimal conversion, then you need to cover both wheels. The fender shown below is from Robmar and provides a relatively low cost solution and offers good protection. We typically use individual fenders since we find they mount easier and are more stable, but the fender shown provides a reasonable solution at a reasonable cost.
You need a way to stop the trailer, so add a Direclink brake controller with an appropriate HD module (the HD module varies by truck brand). This connects to the diagnostic port on the truck and gives the best braking we have found for an HDT. Other brake controllers work – but not as well; and in some cases not at all.
Your basic choices in brake controllers are: Air driven, like a Hayes; electric driven, like the DirecLink. The inertial-based electric brake controllers do not typically do well in use on an HDT.

Next add a TireMinder (TST) TPMS (tire pressure monitor system) to the truck, with 6-10 sensors (depending on if you stay tandem). We mount the color display overhead in the storage area. Extra sensors can be supplied for the trailer. While the TPMS is not a requirement, most people using the trucks in RV service prefer a tire monitor for the trailer tires.
For lighting and electrical we add the RVH Electrical center (includes Jackalope). This component is a required element of any project we work on – we will not work with other “half solutions”. We have found that they cost more in the end, and create additional issues.
The electrical board provides for RV light conversion and the future use of electrical accessories. It includes two DC load centers with fuses (one ignition controlled, one constant), and DIN blocks to pick up lighting signals. It comes with the seven-way trailer wire to reach the back of your truck, and a 7-way connector to plug your trailer into. It also comes with enough #6 wire to connect directly to your battery bank to supply the 12-volt load centers, and a circuit breaker for that line. So basically everything you need to properly hook up your trailer and to support future expansion needs. While we do not sell this as a retail product, you can replicate the function and layout if doing it yourself.
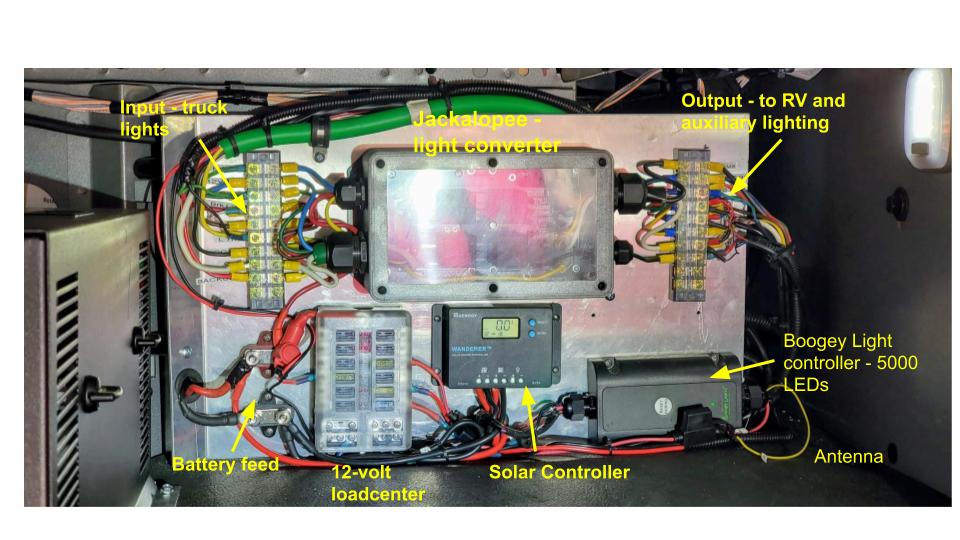
We often get the question on if you have to use a Jackalope for light conversion. The answer is no. While we prefer the quality and robustness of the Jackalope, there are alternative solutions. If you use one of the “cheaper” light converters available at automotive stores remember you are getting what you pay for. We have not had good luck with these converters. Over the years we have had many, MANY of them fail. If you are looking for an alternative our advice is the converter sold by Roadmaster. It seems to be better built than the cheaper imported ones.
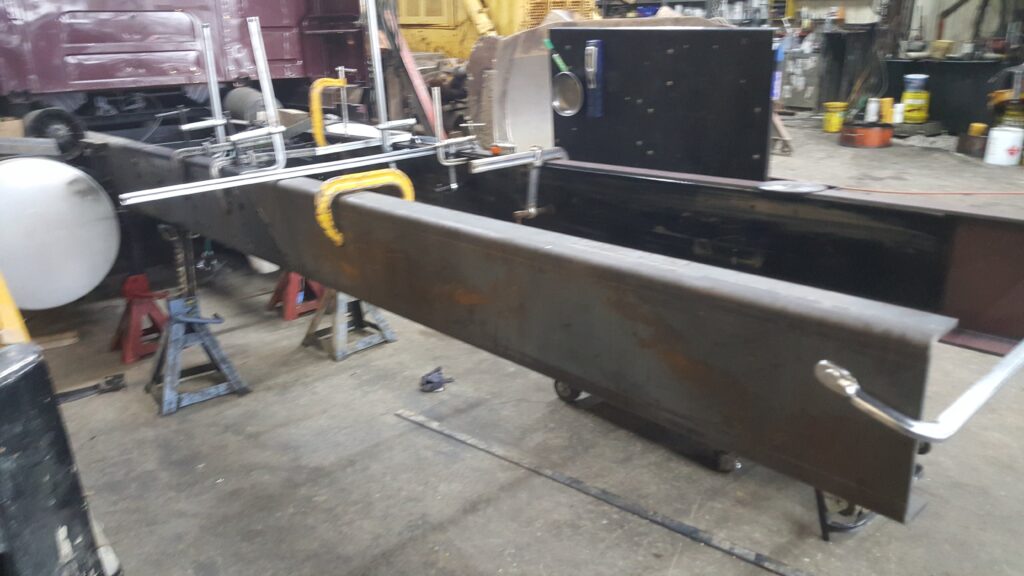
Remove the commercial hitch and add an ET hitch rated for (typically) 5K-8K pin weight. On a tandem truck, this requires some frame extension – about 2’. The ET is upgradeable to a 9,500 pin weight version if required in the future.
We also like the TrailerSaver hitch, if that is what is available to you. But our first choice is an ET. If looking for a used suspension hitch, the TrailerSaver has the most availability on the used market.
We generally put on at least one backup camera at the hitch and a 7″ or 9” monitor at the dash – typically that monitor is a quad-view system. The monitor is surface mounted on the face of the dash, or in the case of the 7″ monitor, it is mounted into the dash. A DVR system that records 6, 9 or 17 channels is an option that can replace the simple display. Also, evaluate providing a video hookup at the rear of the bed to support up to three trailer cameras.
Wire a 7-way RV blade socket at the rear of the truck for towing an RV trailer. This requires the RVH Electrical Center or the equivalent function.
If you have hydraulic disc brakes on your trailer we can upgrade your trailer brake system to BlueDot so that it operates off your truck air system – just like a “regular” semi-trailer. This gives you “best in class” braking for your RV. If you do this a brake controller for electric brakes is not required in the truck, although you might want to include it to be compatible with a “standard” RV or other trailers. There are pros and cons to using BlueDot, which we are happy to discuss with you.
While not required for a minimal conversion, the other thing we do to almost every truck we convert is to change the vertical exhaust stack to a weed burner (horizontal) exhaust. This frees up space for a drom box and allows for additional storage. It also keeps exhaust off the trailer – although with full pollution trucks (trucks with DPF and DEF) exhaust soot is not really a factor. The cost of the weed burner conversion is typically around $1000 and allows for use of a drom box between the cab fairings. Note that if you want a drom, you must switch to a horizontal exhaust.
Singling
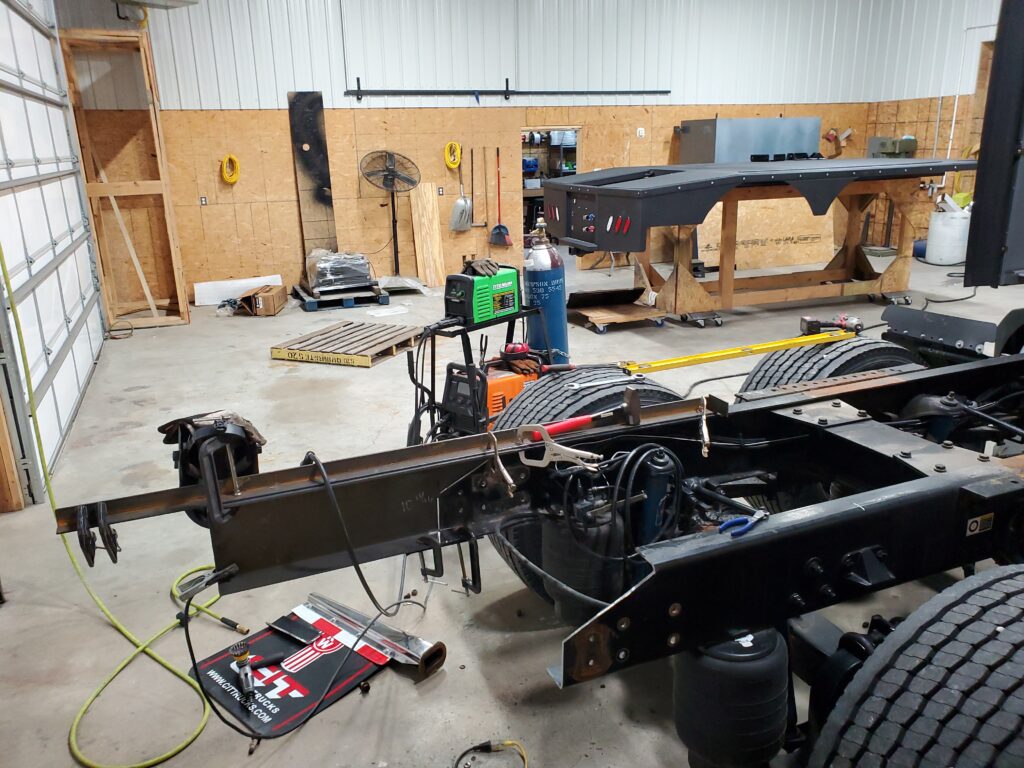
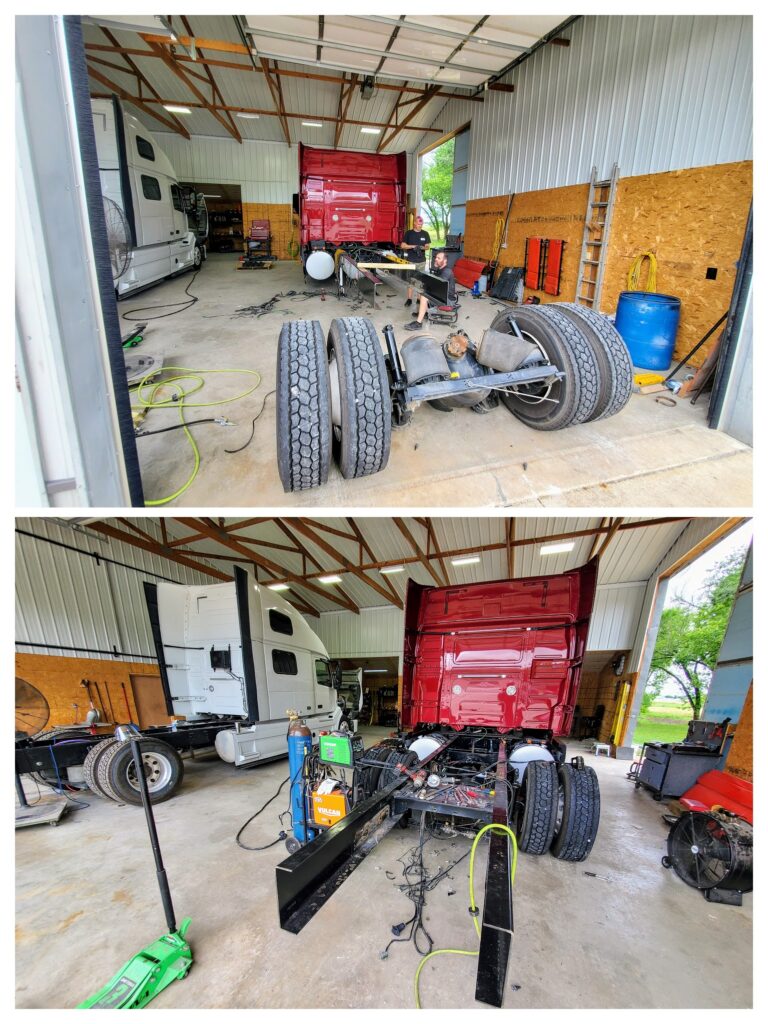
While not part of a typical minimal conversion you should at least consider the virtues of singling. Singling involves removing the forward-most rear axle and relocating the rearward one. There are three positions commonly used to relocate the axle. “Short” which is to place the axle in the forward position where the “removed” axle was. “Long” which is to leave the rearward axle in its original location. And “Mid”, which locates the axle someplace in between the two original locations.
Singling is not required for use in the recreational environment, and is one of the more controversial topics in the recreational HDT community. There are pros and cons to singling like anything else in the RV world. Everyone has an opinion, however many of the negative opinions are based on experience and data from the commercial world – and that does not always translate to the recreational environment, where loads are very light.

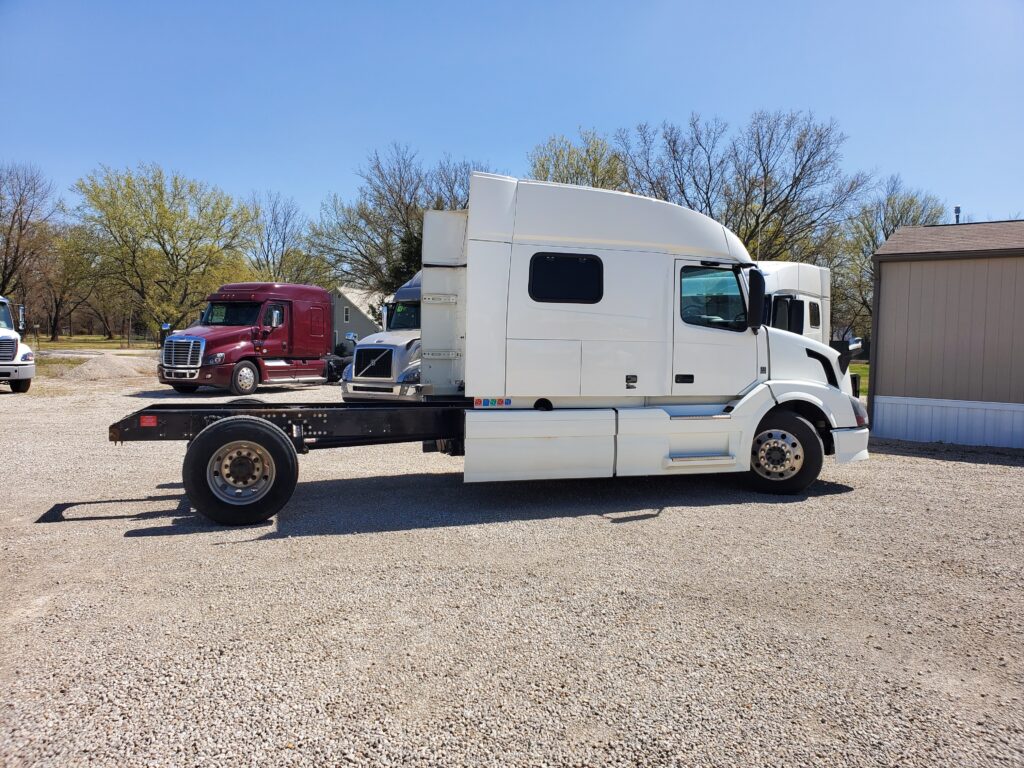
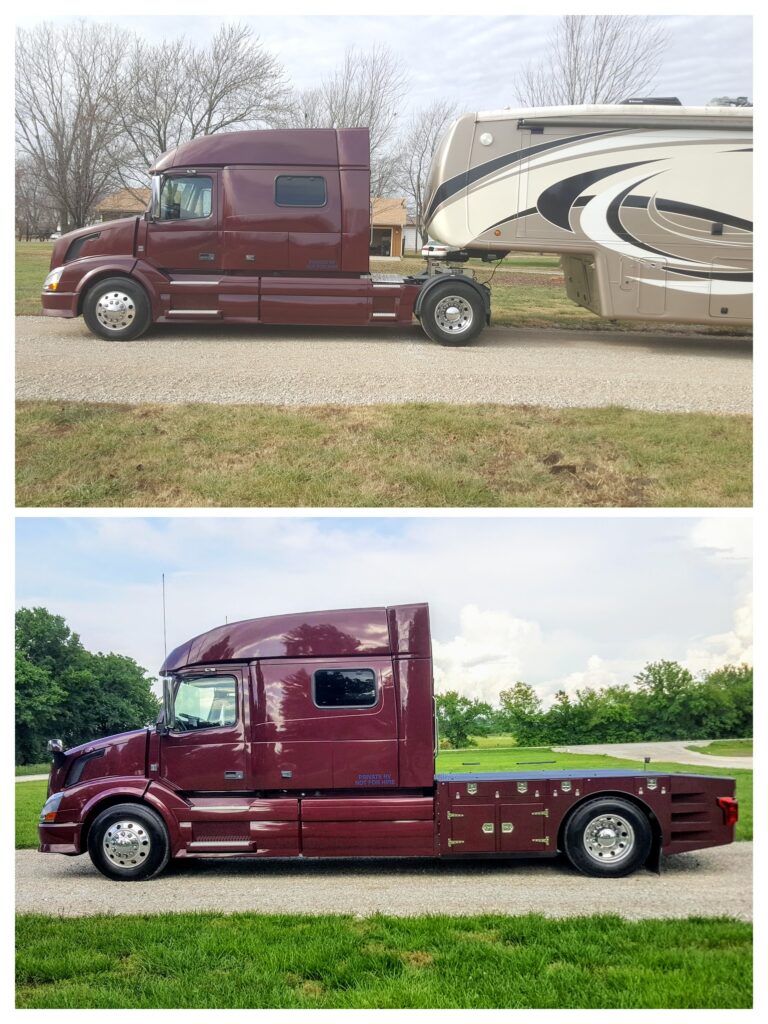
For our premium skirted bed, we always convert to single axle from tandem axles – that bed is designed around a single axle at 99″ from the back of the cab (see the picture of the white truck, above). On our sports utility beds, about 25% of the trucks stay tandem – mainly because this reduces initial costs. While this does decrease initial conversion costs, over time it will cost more leaving the truck tandem. This is simply another item you have to balance as you make decisions in your conversion process.
While singling is mostly a personal preference, it does add significant cargo space to the bed, and simplifies ongoing maintenance quite a bit. It also improves maneuvering if done correctly. If carrying any deck cargo heavier than a smart car, we recommend staying as a tandem, since you would likely be pushing the carrying capacity of the rear (single) axle – which is usually rated in the 19,500 lb area. While you could find a 23K-rated rear axle for a singled truck, it is rare to do an axle swap. However, we can do that work if desired.
Generally, we recommend singling “mid” (middle), since it balances the looks of most trucks better, and allows for a deck that can carry cargo without excessive cantilever of the hitch. This does require drilling new hanger holes, which the other options do not. So it adds to the work and cost (somewhat). But in the end, you get a better solution.
The exception to singling mid is if the mission profile requires a truck that is a “daily driver”, e.g. not designed to carry a car or other significant deck cargo requiring a large(r) deck. In that case, singling short is probably a better solution, since it significantly shortens the wheelbase and provides for a shorter overall vehicle and far better maneuvering capability. If you are driving the vehicle every day, this is a significant benefit. A Volvo 730/780/860 singled short can have a wheelbase as short as 205”, and a 630/640 could be as short as 183”. This depends on several factors, including fuel tank size and position. A singled-mid Volvo 730/780/860 is typically a 236” wheelbase. When singling to carry a smart car, we position the axle at 99” BOC (back of cab) – which is the 236” wb of the 730/780/860.
We never recommend singling “long”. There is no advantage, other than ease of implementation, in doing so and there are significant disadvantages. Mainly, overloading the front axle with deck cargo, significant maneuvering issues vs. mid or short, and looks (the truck looks unbalanced). Singling long may also result in a longer-overall truck since most suspension hitches used with HDTs require being set inside the frame rails. Singling long means having to extend the frame rails to locate the hitch; resulting in a longer overall vehicle than if the axle was more forward, to begin with.
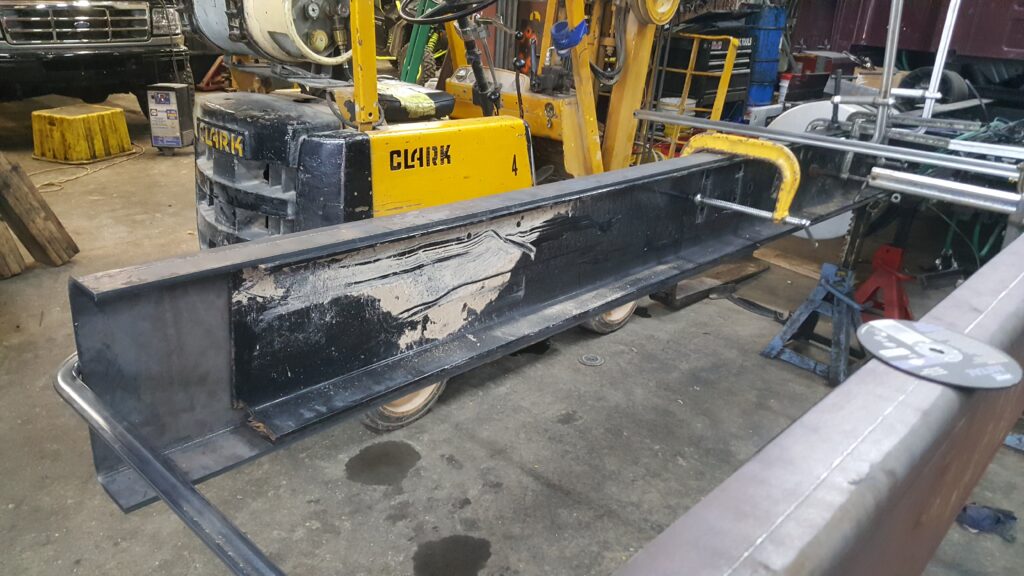
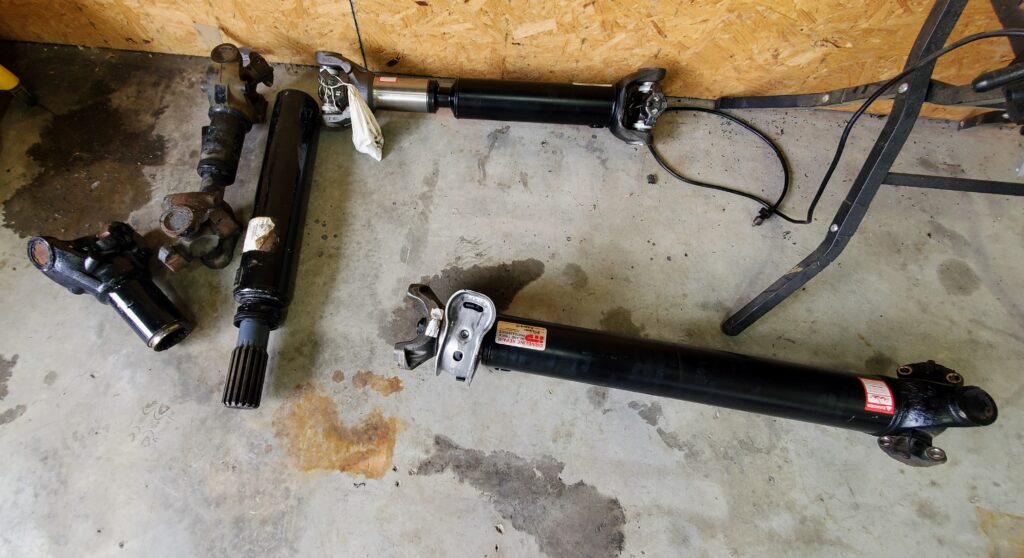
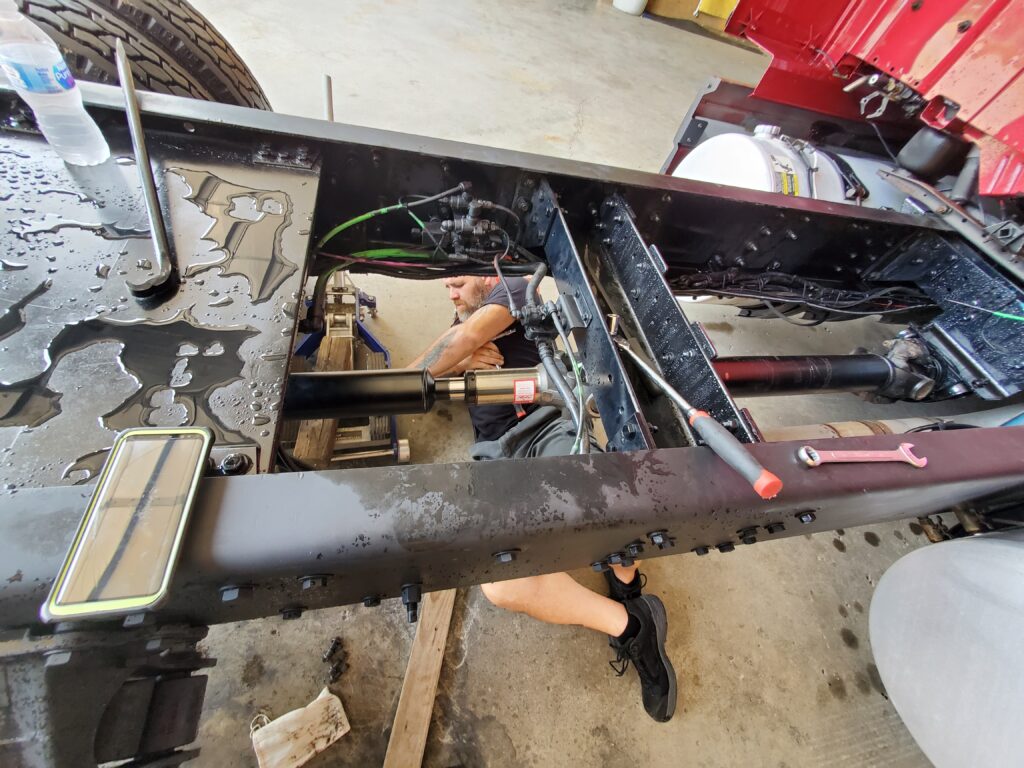
When singling a truck, a new driveshaft must be built for the new length – this is true no matter which position choice is made. A new yoke to attach the driveshaft to the differential is required, and you may have to add/move a carrier assembly to support longer driveshafts. You also relocate airlines, leveling valve, valves/solenoids and support brackets to service the new location. U joints are checked and replaced if required.
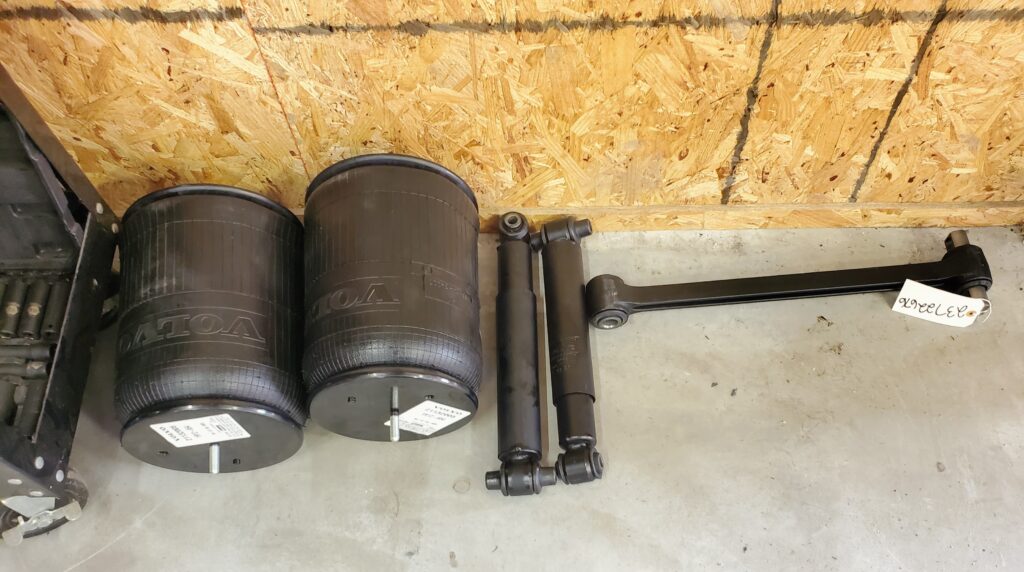
During the singling process, we clean the frame up and paint it (as required), service/replace brakes, suspension elements, torque arm, etc. Often airbags and brake cans are replaced. We also take the opportunity to fully service the cab suspension. This means replacing the airbags, the shocks, perhaps the cab leveling valve, control arm, bushing, and realigning the cab (most of them lean). The ABS brake system is reprogrammed to operate properly and to interface to the Volvo VEST system properly.
There is a great deal of discussion about the value of singling in the HDT community. While you do not have to single a truck, it does have some advantages, and of course some disadvantages. The main disadvantage is the initial cost. Singling, along with the corresponding repairs/improvements discussed above typically averages in the $7,000-$12,000 range. However, some of that is actually repairs and improvements, not “just” singling. In most cases singling a Volvo to the wheelbases we use requires a two-piece driveshaft and adding a carrier bearing and bracket. This adds cost to the process. We only use the highest quality parts (U Joints, yokes etc.), so undertaking singling does add to the overall project cost.
One of the things you often hear about singled trucks is that they do not ride as well as tandem trucks. While this may be true in a specific set of circumstances – like going over speed bumps, where the rear is always supported by the tandems – we do not find it to be generally true in RV use.
Consider the design goals of the original truck – it is designed to carry significant weight on the rear axles – upwards of 35,000 lbs. And it has a suspension designed for that purpose. So even though it has air ride, it is still pretty “stiff” in the rear when tandem. We have driven the same roads with the same model truck that were both tandem and single and frankly don’t find much difference in them when in RV use or bobtail. This would not be applicable to commercial operation with different loading factors.
Another point you hear is that a tandem truck has better traction. This is simply not true in the recreational world. The main point used to support the arguement that tandems have better traction is that the inter-axle lock allows for a front-axle wheel position to be driven, along with the back. While this is true, it does not really gain you much, if anything. The issue with traction in tandems is that the tires are “floating” on the surface. They simply do not have enough weight on them for good traction with the loads we carry. A single axle truck in recreational use will almost always out perform a tandem axle truck in the same set of circumstances – there is simply more pounds per square inch on the road surface. That results in better traction.
If you don’t believe this, ask yourself why the truck manufacturers build lift axles on modern trucks (like Volvo Adaptive Loading). Part of the reason is economy, but all of the manufacturers and drivers of these vehicles say there is far better traction in slippery conditions with the axle up.